Deploy Ruby On Rails:
Ubuntu 26.04 Resolute Raccoon in 2025
The definitive guide to deploying Ruby on Rails to production to your Virtual Private Server (VPS).
Operating System
In this guide, we'll deploy Ruby on Rails using Kamal. Kamal is a deployment tool that uses Docker containers to deploy your application with free SSL certificates and zero downtime deployments.
First, we need a server to deploy our code to. A Virtual Private Server (VPS) is a common choice but you can also deploy to a bare metal server too.
Here are some hosts you could use. We're fans of DigitalOcean and Hetzner.
- DigitalOcean (Get $200 in free credit!)
- Hetzner
- Linode
- Vultr
- Any hosting provider that offers Ubuntu with root access like AWS, Google Cloud, or Azure.
We'll create an Ubuntu server on DigitalOcean in this example, but the process is the same for most hosting providers.
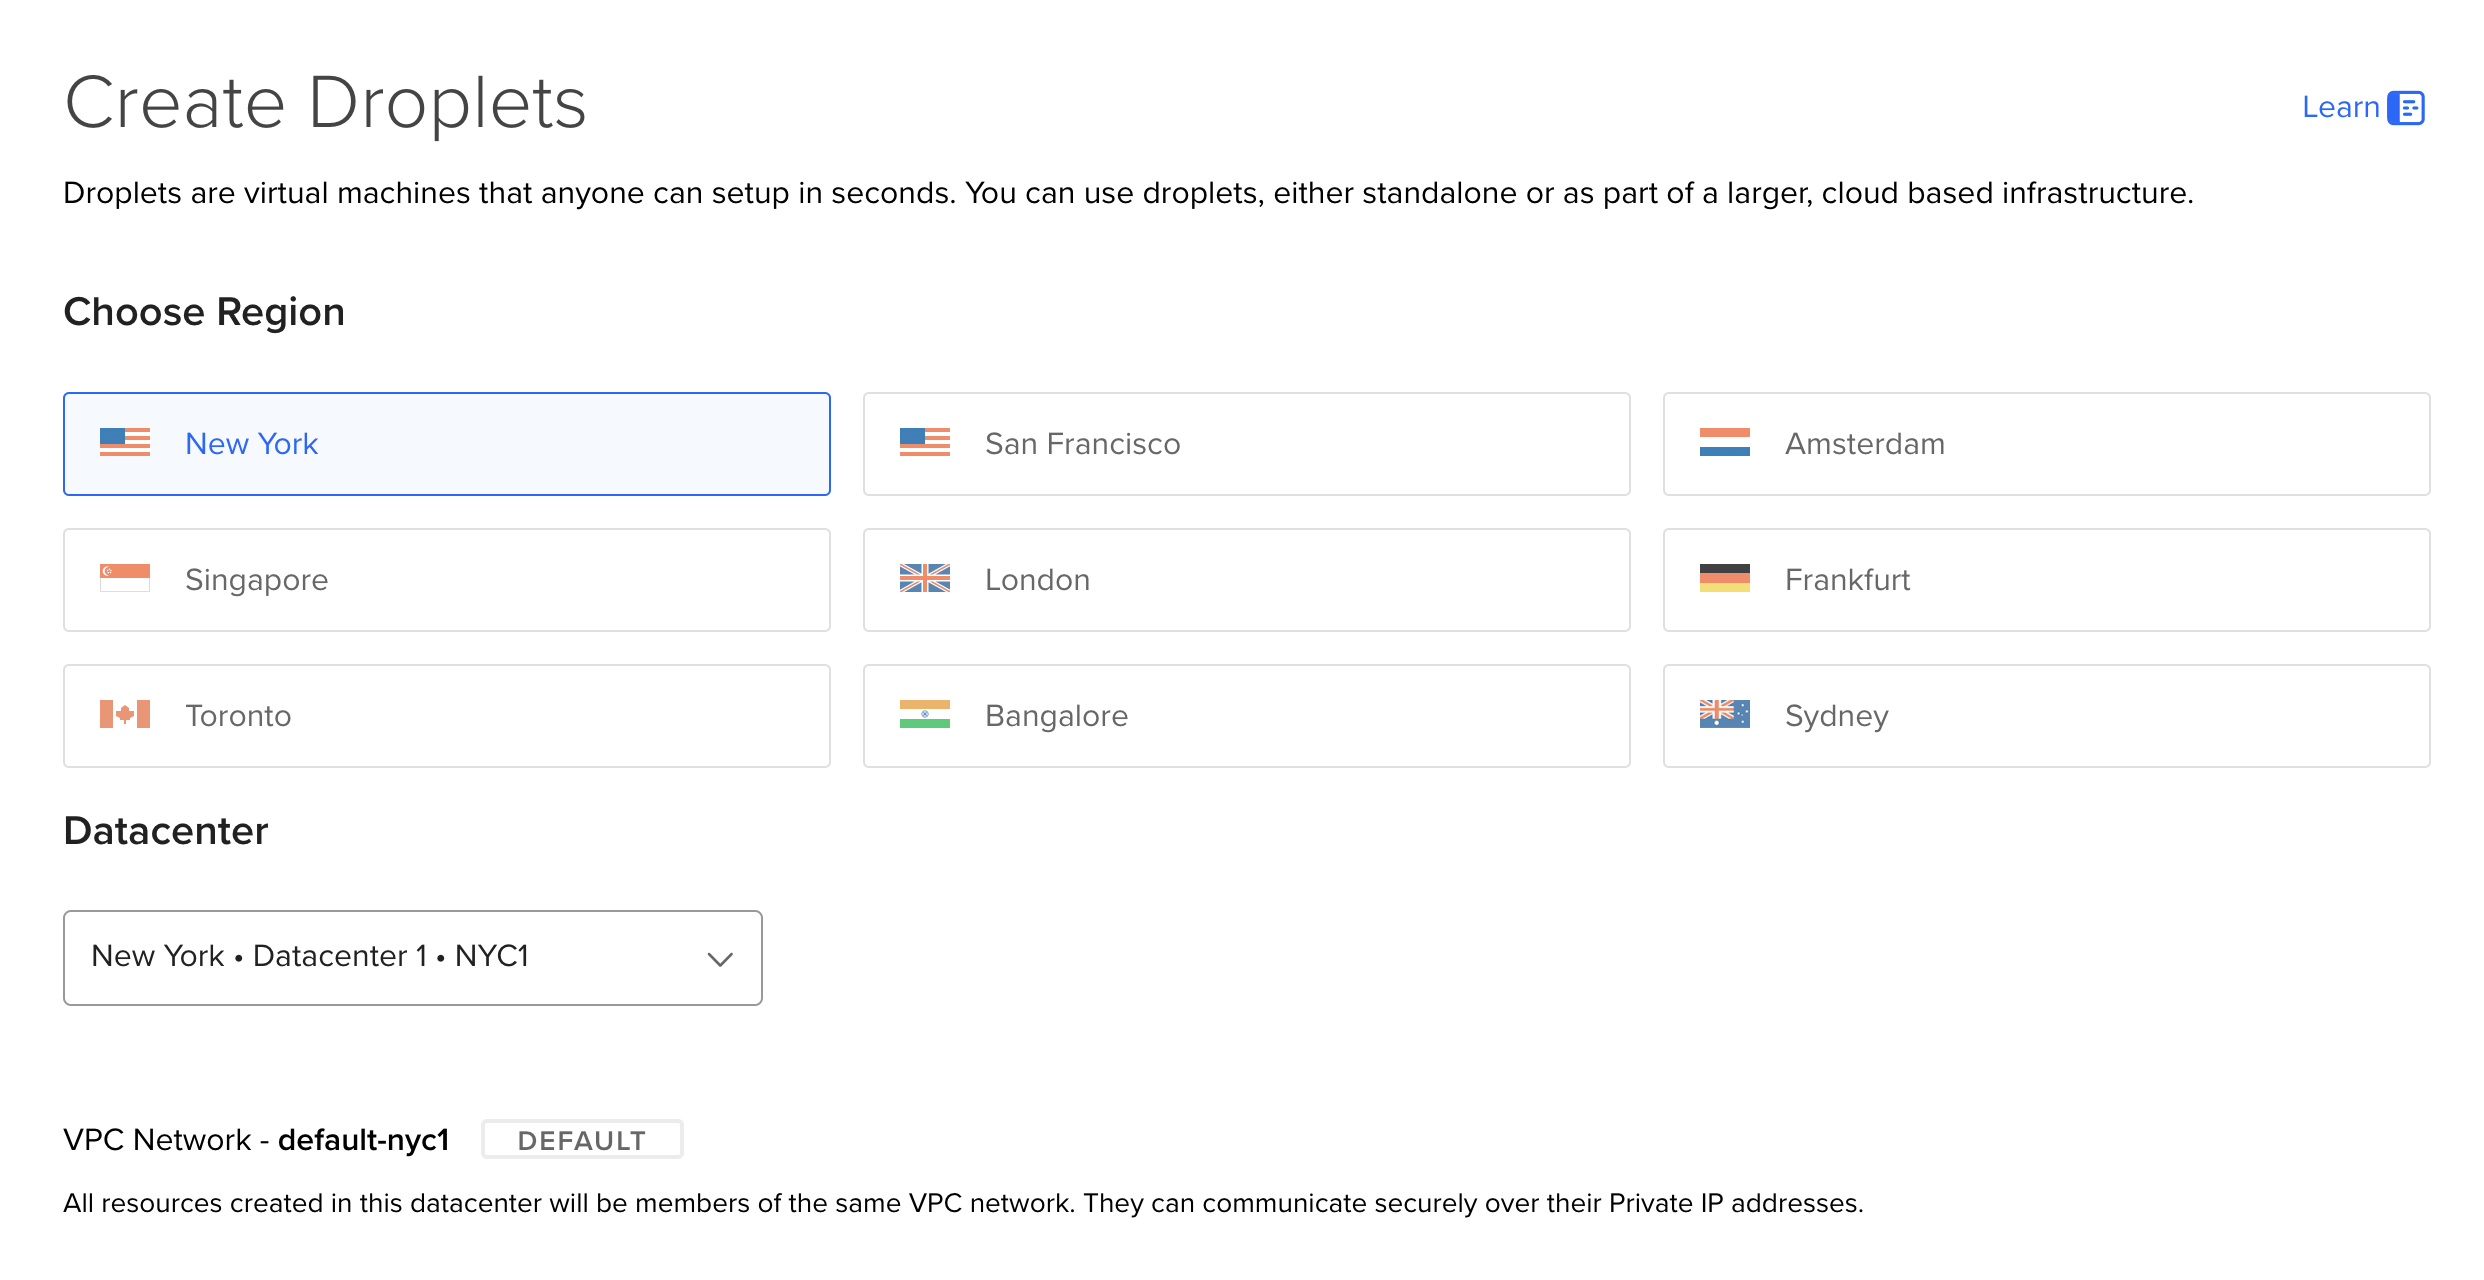
Create A Server
Let's start with Create -> Droplet on DigitalOcean's dashboard. Choose a region near you or your users.
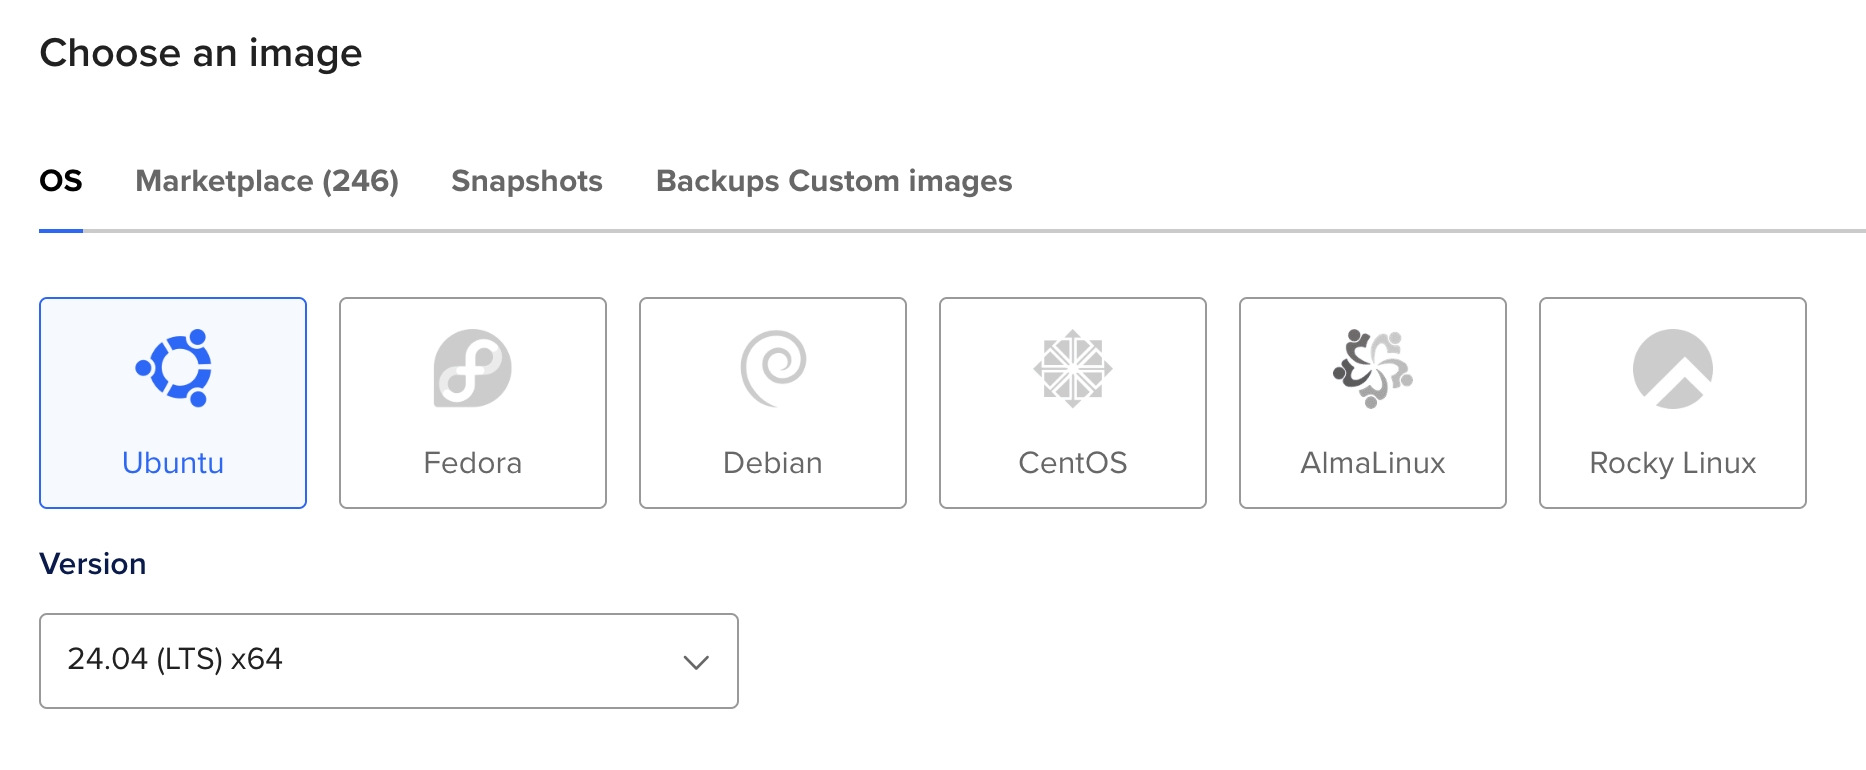
Choose the latest Ubuntu LTS version as the OS. LTS versions get long-term support which is ideal for production.
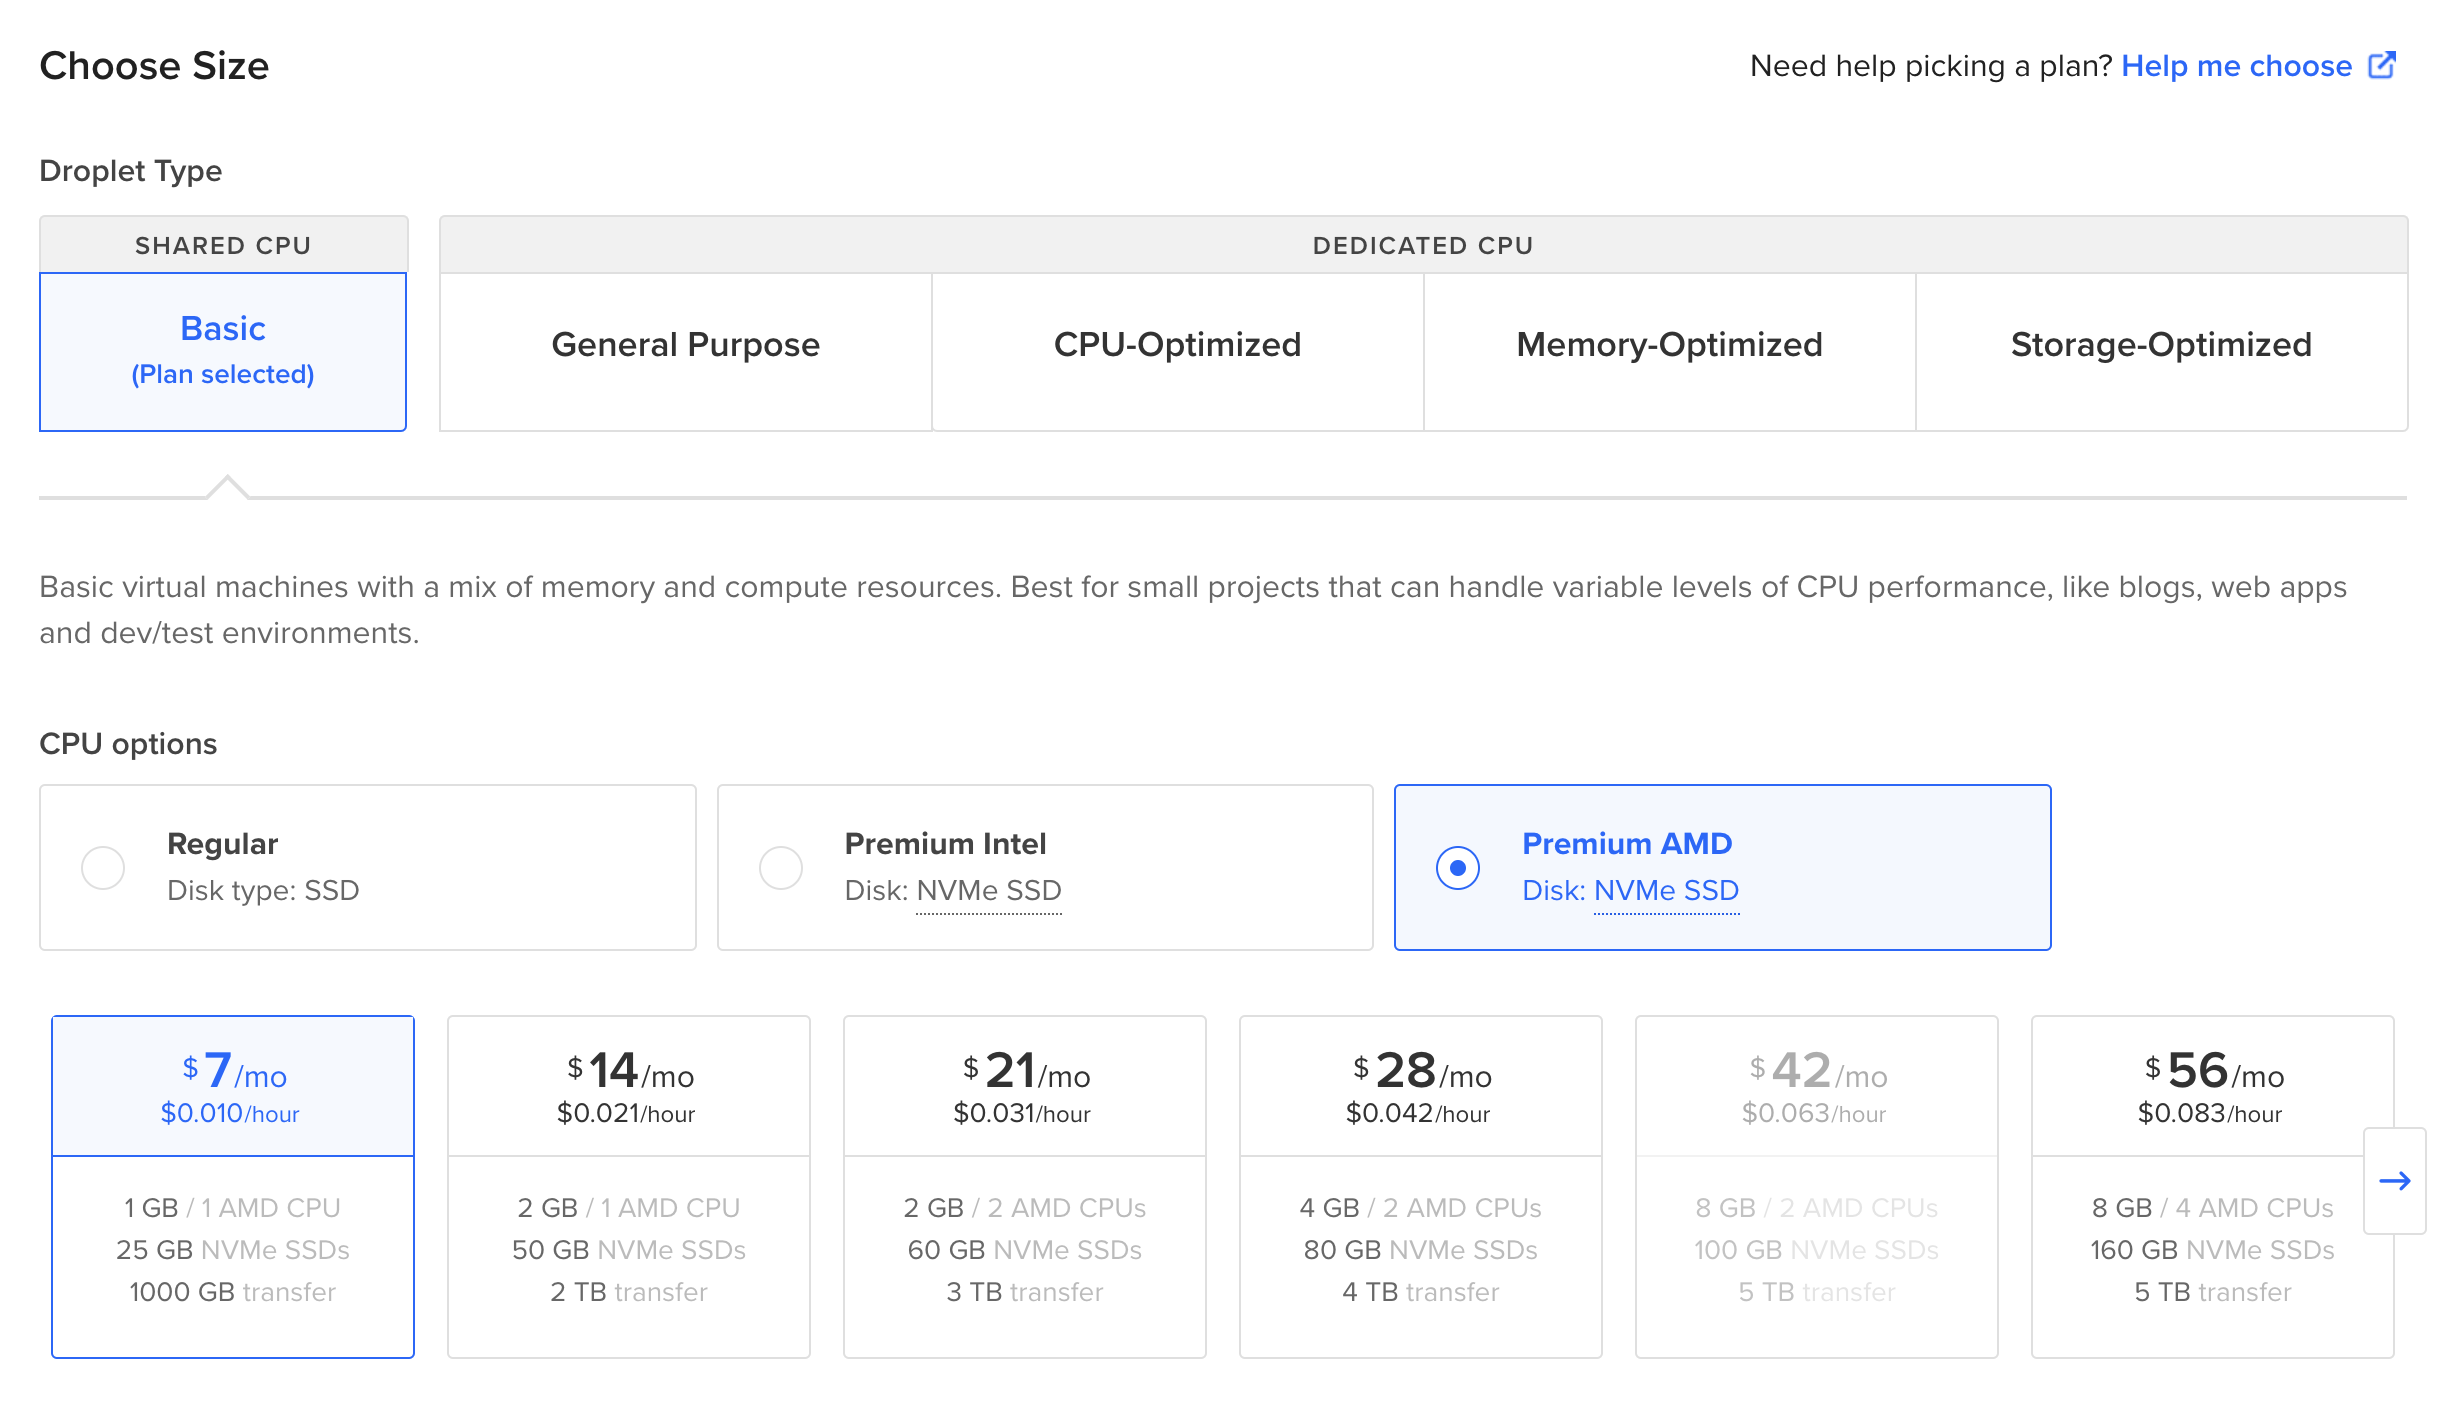
Choose a size for your server. You'll want at least 1GB of RAM but this will depend on your application's needs.
Configuring Kamal
Kamal is a free, open source, zero-downtime deployment tool. New Rails applications come with Kamal pre-installed and configured for the dependencies you've chosen (like PostgreSQL).
If you have an older application, you can add Kamal to the Gemfile and initialize it with the following command.
bundle add kamal && kamal initKamal has 2 main files to configure:
config/deploy.yml.kamal/secrets
The deploy yaml file contains the server IP, roles, domain, and other details for where to deploy your application. The secrets file contains secrets (like API tokens and passwords) like your Docker registry token and Rails master key needed for deployment.
Kamal needs a Docker registry to store the images for our production application. By default, it will use a local registry but you can also configure it to use an external registry like Docker Hub.
Let's update config/deploy.yml with our application name and domain. Change my_app to the name of your application, 192.168.0.1 to your server's IP, and app.example.com to the domain for your application.
# Name of your application. Used to uniquely configure containers.
service: my-app

# Name of the container image.
image: my-user/my-app

# Deploy to these servers.
servers:
  web:
    - 192.168.0.1
  # job:
  #   hosts:
  #     - 192.168.0.1
  #   cmd: bin/jobs

# Enable SSL auto certification via Let's Encrypt and allow for multiple apps on a single web server.
# Remove this section when using multiple web servers and ensure you terminate SSL at your load balancer.
#
# Note: If using Cloudflare, set encryption mode in SSL/TLS setting to "Full" to enable CF-to-app encryption.
proxy:
  ssl: true
  host: app.example.com
  # Proxy connects to your container on port 80 by default.
  # app_port: 3000
Adding Database Servers
The above is the bare bones configuration for Kamal to deploy Rails with SQLite as the database. Your SQLite database will be stored in storage which is mounted as a volume on the host OS. This preserves your database across deploys.
For other databases like PostgreSQL, MySQL or Redis, you will want to add accessories for each service. These services will be run as separate Docker containers and can run on the same or separate machines.
Here are some example accessories for PostgreSQL, MySQL, and Redis.
# Use accessory services (secrets come from .kamal/secrets).
accessories:
postgres:
  image: postgres:18
  host: 192.168.0.1
  port: 5432:5432
  env:
    clear:
      POSTGRES_USER: postgres
      POSTGRES_DB: my_app_production
    secret:
      - POSTGRES_PASSWORD
  directories:
    - data:/var/lib/postgresql/data

mysql:
  image: mysql:8
  host: 192.168.0.1
  # Change to 3306 to expose port to the world instead of just local network.
  port: "127.0.0.1:3306:3306"
  env:
    clear:
      MYSQL_ROOT_HOST: '%'
    secret:
      - MYSQL_ROOT_PASSWORD
  files:
    - config/mysql/production.cnf:/etc/mysql/my.cnf
    - db/production.sql:/docker-entrypoint-initdb.d/setup.sql
  directories:
    - data:/var/lib/mysql

redis:
  image: redis:8
  host: 192.168.0.1
  port: 6379
  directories:
- data:/dataDeploy your Rails application
Now that we've told Kamal how to access Docker Hub and our server, it's time to deploy.
For our first run, we need to set up the server to get it ready for deployments and deploy our app for the first time.
kamal setupOpen your server's IP address (or domain) in your browser to view your newly deployed app!
You can deploy new changes with the deploy command.
kamal deploy