Deploy Ruby On Rails on
Ubuntu 14.04 Trusty Tahr
A guide to setting up a Ruby on Rails production environment
Operating System
Overview
This will take about 30 minutes.
Save time and use Hatchbox.io
Hatchbox configures your servers, automatically handles updates, and deploy Rails apps in minutes.
We will be setting up a Ruby on Rails production environment on Ubuntu 14.04 LTS Trusty Tahr.
Since we setup Ubuntu for our development environment, we also want to use it in production. This keeps your application running consistently between development and production. We're using an LTS version of Ubuntu in production because it is supported for several years where a normal version of Ubuntu isn't.
Using Ubuntu LTS in production allows you to continue receiving security updates which is important for your production server(s).
We're going to be setting up a Droplet on Digital Ocean for our server. It costs $5/mo and is a great place to host your applications.
If you sign up with my Digital Ocean referral link, you'll get 2 months ($10) free credit to try it out.
Creating A Virtual Private Server
You can use any cloud server hosting company you choose for your Rails application. I've had excellent experience with Digital Ocean and Linode with the servers I have used. If you're looking for alternatives outside the US or otherwise, just google "VPS hosting". A VPS is a virtual private server. It's just like a server you setup at home, only virtualize and running with a suite of other servers in a datacenter.
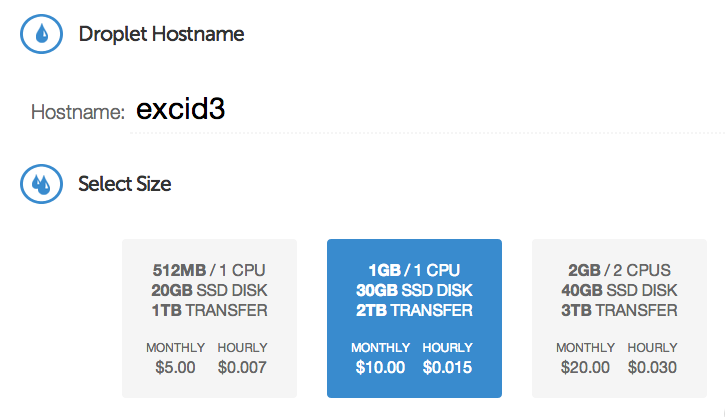
Since we're using Digital Ocean for our cloud server, the first thing we're going to do is configure a new one. I'm going with the Droplet with 1GB of RAM. You can setup whichever size server you prefer, keep in mind that if you choose a 512MB server you may run into some slowness with a low amount of RAM.
The next step is to choose your location. Choose one close to you so that you can have better connection speeds.

Last, but not least we need to choose which OS to use. We're going to be using Ubuntu 14.04 LTS x64. Your application may require a different OS or version, but if you're not sure this is generally what you should use.

Optionally you can add your SSH key into the Droplet so you can SSH in and skip the ssh-copy-id step.
Once Digital Ocean has configured your server, check your email to get your password for the new cloud server.
You should follow the instructions in the email to login via SSH for the very first time and verify it is working.
The first thing we will do on our new server is create the user account we'll be using to run our applications and work from there.
sudo adduser deploy
sudo adduser deploy sudo
su deploy
Before we move forward is that we're going to setup SSH to authenticate via keys instead of having to use a password to login. It's more secure and will save you time in the long run.
We're going to use ssh-copy-id to do this. If you're on macOS you may need to run brew install ssh-copy-id but if you're following this tutorial on Linux desktop, you should already have it.
Once you've got ssh-copy-id installed, run the following and replace IPADDRESS with the one for your server:
Make sure you run ssh-copy-id on your computer, and NOT the server.
ssh-copy-id deploy@IPADDRESSNow when you run ssh deploy@IPADDRESS you will be logged in automatically. Go ahead and SSH again and verify that it doesn't ask for your password before moving onto the next step.
For the next steps, make sure you are logged in as the deploy user on the server!
Installing Ruby
The first step is to install dependencies for compiling Ruby.
Open your Terminal and run the following commands to install them.
sudo apt-get update
sudo apt install build-essential rustc libssl-dev libyaml-dev zlib1g-dev libgmp-dev
Next, we'll install Ruby using a version manager called Mise. This allows you to easily update Ruby and switch between versions anytime.
curl https://mise.run | sh
echo 'eval "$(~/.local/bin/mise activate)"' >> ~/.bashrc
source ~/.bashrc
Then install Ruby with Mise:
mise use --global ruby@3Confirm that Ruby is installed and works:
ruby --version
#=> 3.4.7
You also want to ensure you're using the latest version of Rubygems.
gem update --systemOptionally, if you plan to use Node.js for handling assets, you can use Mise to install Node as well.
mise use --global node@24.11.0

node -v
#=> 24.11.0
Installing Nginx
Phusion is the company that develops Passenger and they recently put out an official Ubuntu package that ships with Nginx and Passenger pre-installed.
We'll be using that to setup our production server because it's very easy to setup.
sudo apt-key adv --keyserver hkp://keyserver.ubuntu.com:80 --recv-keys 561F9B9CAC40B2F7
sudo apt-get install -y apt-transport-https ca-certificates

# Add Passenger APT repository
sudo sh -c 'echo deb https://oss-binaries.phusionpassenger.com/apt/passenger trusty main > /etc/apt/sources.list.d/passenger.list'
sudo apt-get update

# Install Passenger & Nginx
sudo apt-get install -y nginx-extras passenger
So now we have Nginx and passenger installed. We can manage the Nginx webserver by using the service command:
sudo service nginx startOpen up the server's IP address in your browser to make sure that nginx is up and running.
The service command also provides some other methods such as restart and stop that allow you to easily restart and stop your webserver.
Next, we need to update the Nginx configuration to point Passenger to the version of Ruby that we're using. You'll want to open up /etc/nginx/nginx.conf in your favorite editor. I like to use vim, so I'd run this command:
sudo vim /etc/nginx/nginx.conf
# You could also use nano if you don't like vim
# sudo nano /etc/nginx/nginx.conf
Find the following lines, and uncomment them:
##
# Phusion Passenger
##
# Uncomment it if you installed ruby-passenger or ruby-passenger-enterprise
##

include /etc/nginx/passenger.conf;
Save and close nginx.conf. Then open /etc/nginx/passenger.conf in your editor to modify the ruby line:
sudo vim /etc/nginx/passenger.conf

# You could also use nano if you don't like vim
# sudo nano /etc/nginx/passenger.conf
And change the passenger_ruby line to point to your ruby executable:
passenger_ruby /home/deploy/.rbenv/shims/ruby; # If you use rbenv
# passenger_ruby /home/deploy/.rvm/wrappers/ruby-2.1.2/ruby; # If use use rvm, be sure to change the version number
# passenger_ruby /usr/bin/ruby; # If you use ruby from source
The passenger_ruby is the important line here. Make sure you only set this once and use the line from the example that pertains to the version of Ruby you installed..
Once you've changed passenger_ruby to use the right version Ruby, you can run sudo service nginx restart to restart Nginx with the new Passenger configuration.
Now that we've restarted Nginx, the Rails application will be served up using the deploy user just how we want. In the Capistrano section we will talk about configuring Nginx to serve up your Rails application.
MySQL and PostgreSQL Database Setup
Setting up your production database is pretty easy. Make sure to keep in mind that you should use a different password for your production databases.
Depending on what database you want to use, follow the steps related to the database:
Installing MySQL
All you need to do in order to install MySQL is to run the following command:
sudo apt-get install mysql-server mysql-client libmysqlclient-devYou can use the root user and password set during installation for your database or you can add a new user to MySQL.
Installing PostgreSQL
Postgres 9.3 is available in the Ubuntu repositories and we can install it like so:
sudo apt-get install postgresql postgresql-contrib libpq-devNext we need to setup our postgres user:
sudo su - postgres
createuser --pwprompt
exit
The password you type in here will be the one to put in your my_app/current/config/database.yml later when you deploy your app for the first time.
Capistrano Setup
For Capistrano, make sure you do these steps on your development machine inside your Rails app.
The fancy new verison of Capistrano 3.0 just shipped and we're going to be using it to deploy this application.
The first step is to add Capistrano to your Gemfile:
gem 'capistrano', '~> 3.1.0'
gem 'capistrano-bundler', '~> 1.1.2'
gem 'capistrano-rails', '~> 1.1.1'

# Add this if you're using rbenv
# gem 'capistrano-rbenv', github: "capistrano/rbenv"

# Add this if you're using rvm
# gem 'capistrano-rvm', github: "capistrano/rvm"
Once these are added, run bundle --binstubs and then cap install STAGES=production to generate your capistrano configuration.
Next we need to make some additions to our Capfile to include bundler, rails, and rbenv/rvm (if you're using them). Edit your Capfile and add these lines:
require 'capistrano/bundler'
require 'capistrano/rails'

require "capistrano/scm/git"
install_plugin Capistrano::SCM::Git

# If you are using rbenv add these lines:
# require 'capistrano/rbenv'
# set :rbenv_type, :user # or :system, depends on your rbenv setup
# set :rbenv_ruby, '2.0.0-p451'

# If you are using rvm add these lines:
# require 'capistrano/rvm'
# set :rvm_type, :user
# set :rvm_ruby_version, '2.0.0-p451'
After we've got Capistrano installed, we can configure the config/deploy.rb to setup our general configuration for our app. Edit that file and make it like the following replacing "myapp" with the name of your application and git repository:
set :application, 'myapp'
set :repo_url, 'git@github.com:excid3/myapp.git'

set :deploy_to, '/home/deploy/myapp'

set :linked_files, %w{config/database.yml}
set :linked_dirs, %w{log tmp/pids tmp/cache tmp/sockets vendor/bundle public/system}

namespace :deploy do

  desc 'Restart application'
  task :restart do
    on roles(:app), in: :sequence, wait: 5 do
      execute :touch, release_path.join('tmp/restart.txt')
    end
  end

  after :publishing, 'deploy:restart'
  after :finishing, 'deploy:cleanup'
end
Now we need to open up our config/deploy/production.rb file to set the server IP address that we want to deploy to:
set :stage, :production

# Replace 127.0.0.1 with your server's IP address!
server '127.0.0.1', user: 'deploy', roles: %w{web app}
If you have any trouble with Capistrano or the extensions for it, check out Capistrano's Github page.
Next Steps
Thankfully there aren't a whole lot of things to do left!
Adding The Nginx Host
In order to get Nginx to respond with the Rails app, we need to modify it's sites-enabled.
Open up /etc/nginx/sites-enabled/default in your text editor and we will replace the file's contents with the following:
server {
        listen 80 default_server;
        listen [::]:80 default_server ipv6only=on;

        server_name mydomain.com;
        passenger_enabled on;
        rails_env    production;
        root         /home/deploy/myapp/current/public;

        # redirect server error pages to the static page /50x.html
        error_page   500 502 503 504  /50x.html;
        location = /50x.html {
            root   html;
        }
}
This is our Nginx configuration for a server listening on port 80. You need to change the server_name values to match the domain you want to use and in root replace "myapp" with the name of your application.
Connecting The Database
You can run cap production deploy to deploy your application.
The file config/database.yml needs to be updated for the production database server username, password, and host. You can set host to "localhost" and you will have to create a database on the server with the same name. Capistrano won't create it for you because it's something that should really only happen once. After deploying you can set create it by SSHing in and running RAILS_ENV=production bundle exec rake db:create in your app's /home/deploy/myapp/current directory (just change "myapp" to match the name of your app).
Something you should consider is only storing the database credentials on the server and having Capistrano symlink the database.yml file so that it doesn't have to be stored in git. This is especially important when you have a public git repository and don't want to publish your database credentials.
Restarting The Site
One last thing you should know is that restarting just the Rails application with Passenger is very easy. If you ssh into the server, you can run touch myapp/current/tmp/restart.txt and Passenger will restart the application for you. It monitors the file's timestamp to determine if it should restart the app. This is helpful when you want to restart the app manually without deploying it.
Conclusion
And there you have it, a very long-winded explanation of all the different things you need to do while setting up an application to be deployed. There is a lot of system administration pieces that can expand upon this, but that's for another time. Please let me know if you have any questions, comments, or suggestions!